Guides
Bulk actions in Profile Manager without confusion over selected profiles
Bulk actions in Profile Manager without confusion over selected profilesGuides
Need to open profiles from one project, assign them proxies, update the browser, or hand the work over to a colleague? In Profile Manager, you can do this for several profiles at once. The key is to understand exactly which rows are selected before running a command.
In this guide, we’ll cover search and selection, everyday bulk operations, data transfer, and working with the cloud. You’ll learn how to build the right selection and check the result so you don’t accidentally change a neighboring project.
First find the profiles, then select them
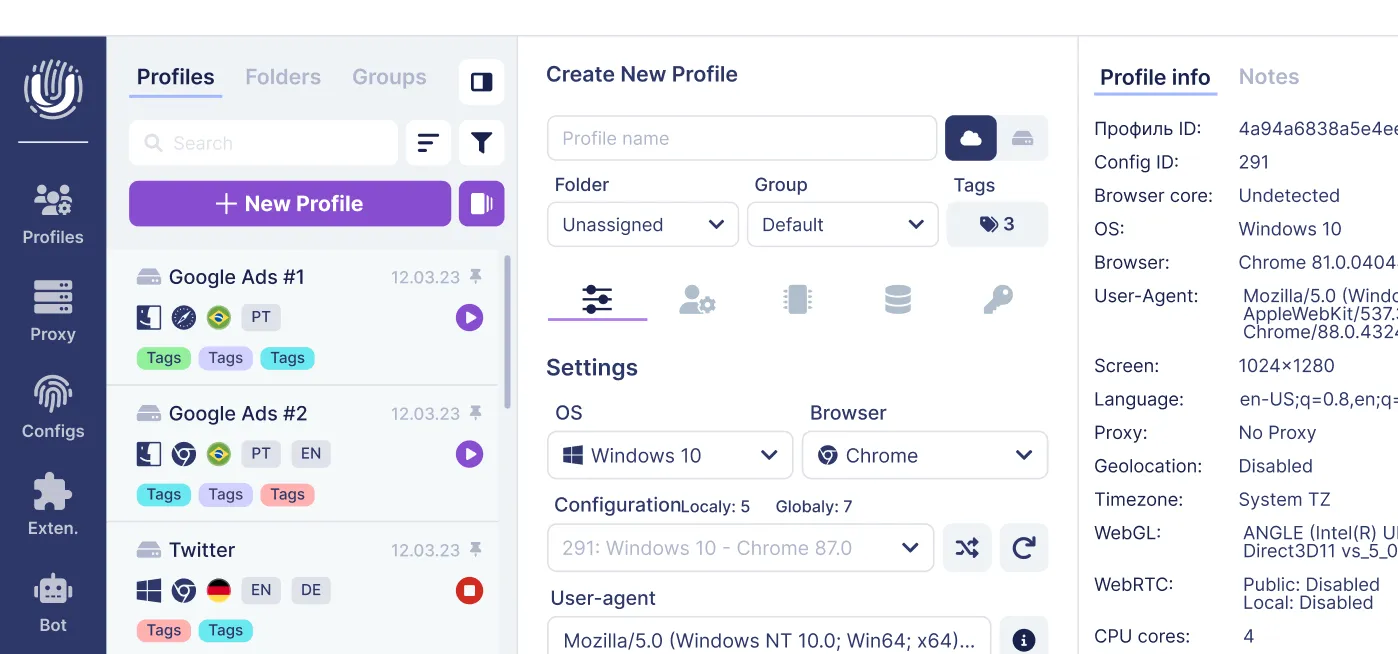
Open Profiles → Profiles Manager in the Undetectable sidebar. Depending on the interface language, the section is called “Profiles” or “Profiles Manager”. Below, we provide the Russian command names and the English labels that make them easy to find.
There are three different actions in the manager:
| Action | What it’s for |
|---|---|
| Search and filters | Leave only the profiles that match your task in the table |
| Sorting | Arrange rows in a convenient order |
| Selection | Specify the profiles you want to apply a command to |
If the search found six profiles, it does not mean all six are selected. Use the row highlighting and the selection counter at the bottom of the window as your reference.
The numbers next to search describe the search results. To check a bulk action, look specifically at the selection counter at the bottom.
How to prepare a convenient list
Start with an attribute that lets you confidently separate the profiles you need: part of the name, the project folder, a tag, or a cloud group. If necessary, refine the storage type and status.
The manager’s filters let you work with local and cloud profiles, folders, groups, tags, and statuses. Statuses include available, started, locked, archived, and deleted profiles. Everyday work and restoring from the recycle bin require different lists.
Use Columns / Columns to configure the table for your task. Before changing proxies, it is useful to see the profile name and proxy; before moving profiles to the cloud — the type and group; before updating — the browser version and status. If the field you need is beyond the right edge of the window, use horizontal scrolling.
Search can also find matches in notes, so an unexpected row in the results should not automatically be considered a mistake. Check its name and project affiliation.
How to select the set you need
For the entire prepared result set, use Select all / Select all. First narrow the list, then click the button and check the bottom counter.
For a consecutive range, select the starting row and expand the selection by holding Shift and pressing the up or down arrows. Before doing this, set a convenient sort order: the range depends on the row order.
To select individual profiles, hold Ctrl and click the rows you need one by one. This lets you build any set of profiles, even if they are not next to each other.
If the profiles you need are scattered throughout the table, it is often easier to first gather them by folder or tag. This is easier to verify than a long selection among similar names.
First scenario: open profiles from one project
Suppose you need to start working with six client profiles.
-
Find the project by name or filter its folder.
-
Review all found rows. Remove profiles from another project from the selection if the names are similar.
-
Click Select all .
-
Click Start / Start. An alternative path is the context menu and the Open / Open command.
-
Make sure the correct profiles have started. If some of them remain closed, first find out the reason for those rows.
To finish work, select the started profiles you need and use Stop browser / Close in the context menu. Wait for the browser windows to close, and when working with the cloud, wait for synchronization to complete.
Start with a small batch if you do not yet know how many profiles your computer can comfortably launch at the same time. The batch size depends on the websites, extensions, and device resources.
The manager performs operations with profiles. If you need to repeat clicks and text input inside several browsers, use the separate Synchronizer.
Folders, tags, and groups: what to choose for organization
These tools solve different tasks. A convenient setup for a team is: folder — project, tag — work stage, cloud group — employee access.
Folders: gather project profiles
Select profiles, open the context menu, and choose Set Folder / Set folder, then the required folder. After the operation, check profile membership by opening this folder.
Folders help, for example, separate agency clients or stores. In the main window, clicking a folder filters the profiles associated with it. You can create and rename folders in the folder management section — this is described in more detail here.
Assigning a folder in the manager organizes the list. The path where profile files are physically stored on the computer is changed separately in the application settings.
Tags: mark a stage or property
Use Set Tag / Set tags to mark selected profiles, for example with the tags “Check proxy”, “Ready to work”, or “Hand over to colleague”. You can then use these labels to build the next work selections.
Before a bulk change, check which tags the profiles already have. If their tag sets differ, start with a small group and check the resulting labels. This is especially useful when you need to keep individual tags and add only one shared tag.
The tag menu may include Select all, Unselect all, and Clear tags. Here, this refers to tags inside this menu. Unselecting tags should not be confused with deselecting rows in the table. Use Clear tags / Clear tags when you really want to remove labels from the selected profiles.
More details on assignment methods are available in the tag guide.
Cloud groups: organize team access
For cloud profiles, use Set Group / Change group. Changing a group is important not only for order in the list: groups are connected to employee access. A profile can be in one cloud group at a time.
Before moving profiles, agree on the required group with the administrator, and afterward check that the colleague can see the profiles. Details on organizing access are provided in the cloud profiles documentation.
How to assign proxies in bulk
Prepare and check connections in Proxy Manager. Then return to the profile manager, select the required rows, and open Set Proxy / Set proxy. Choose the required entry and check the proxy column for the profiles.
Pay attention to the meaning of the action: you are choosing a specific proxy for the selected group. If each profile needs a separate connection, split the work into the corresponding sets. Do not expect that selecting one entry will automatically distribute the entire proxy list among profiles.
To check the result, open the settings of one of the changed profiles, check the connection, and launch it. If the task is tied to a specific country or address, check the actual external IP. A successfully assigned entry does not by itself confirm that the server is working.
When changing proxies for working profiles, first finish the current work in the browser. This will make it easier to make sure the next launch uses the required connection.
Bulk editing, start page, and launch mode
For general settings changes, open Actions → Edit / Actions → Edit after selecting profiles. Before saving, reread the parameters you are going to apply to the entire group. Do not combine profiles that need different values into one operation.
A good workflow is: one small batch, one clear change, and a result check. If you change several network settings, the proxy, and launch behavior at the same time, it will be harder to understand the cause of a problem.
For fingerprints, we recommend using the default settings; when creating profiles, choose configurations with an OS that matches the device OS and an up-to-date Chrome. We explain this in more detail in the configuration setup documentation. Bulk editing does not make arbitrary fingerprint changes a mandatory work step.
Two separate commands are useful at the start of the workday:
| Command | What it configures |
|---|---|
| Set start page / Set start page | The address needed at launch |
| Set start option / Set launch option | Opening the start page or previously opened tabs |
If you set the required address but the profile continues to open old tabs, check the launch option. After setup, test one profile: close it, launch it again, and see which page appears.
The start page helps you immediately open the work dashboard. Bookmarks are useful for several regularly used links; importing them is covered below.
Browser update and conversion to Chromium
To update the configuration of selected profiles, use Update browser / Update browser in the actions menu or context menu. Before updating, finish working with the profiles.
Run the update first on a small group. Then open the working sites and check the required extensions and automation scenarios. If everything works as expected, move on to the next batch. It is convenient to check the version in the Browser column.
The command applies to the profile browser. Updating the Undetectable application itself is a separate operation. The procedure for updating profiles is provided in the instructions.
The interface also includes the Convert to Chromium / Convert to Chromium command for applicable profiles on another engine. This changes the engine, so do not use it as a replacement for a normal update. Read the warning about irreversibility and prepare a copy of the necessary data in advance. The presence of an export file should not be considered a guarantee that the browser version can be rolled back.
Import and export: first decide which data you need
The menu may have separate commands for profiles, cookies, accounts, and bookmarks. They work with different data.
| Task | Which command to look for |
|---|---|
| Transfer a profile via a file | Import Profile / Export Profile |
| Load or save cookies | Import Cookies / Export Cookies |
| Transfer saved account records | Import Accounts / Export Accounts |
| Load a set of bookmarks | Import bookmarks |
Importing and exporting profiles
To import, click Import / Import, select a profile file, and confirm the upload. Then find the added profiles in the manager. If you do not see them, clear the search query and check the filters: new rows may not match the previous selection.
To export, first select the required profiles, check the count, click Export / Export, and choose a save location. After completion, make sure the file appears in the selected folder. When transferring to another computer, check the import and required data before deleting the source profiles.
Importing local profiles is available on Base, Professional, and Custom; exporting local profiles is available on Professional and Custom. These options are not available on Free. This limitation applies to profiles: it cannot automatically be extended to all commands named “Import” or “Export”. You can check the conditions on the pricing page and in the profile transfer instructions.
Cookies
Cookie import loads cookie data into a profile. JSON and Netscape are supported; expired cookies are not imported by default, but there is a separate setting for this. More details are available in the cookie guide.
Do not use this import as a substitute for transferring an entire profile. And do not load one set of cookies into all selected rows if each needs its own set. When the correspondence between files and profiles is not obvious, import separately for the required profile and check the result in the Cookies tab.
Accounts
Account commands apply to saved credential records. The import format matches the Chrome format; records can be managed in the accounts tab in profile settings. This is described in the documentation.
Importing records does not mean that all sites will automatically be logged in. After transferring, check the required service. Store export files with credentials as carefully as the passwords themselves.
Bookmarks
The Import bookmarks command lets you load bookmarks. After importing, check the links in one of the target profiles. If the goal is to automatically open a site at launch, configure the start page and launch option: the presence of a bookmark alone does not do this.
Clearing cache and browser data: choose based on the task
The context menu includes Clear cache / Clear cache and Clear browser data / Clear browser data. Before clearing, finish working with the profiles.
Clearing the cache is used to remove temporary files. Clearing browser data is a broader action: it can affect site data and lead to loss of saved work state, including authorization. Before confirming, reread the warning, check the number of profiles, and save the data you will need later.
If the problem occurred in only one profile, start with it. You do not need to clear the entire work group to diagnose one failure.
For regular space saving, the program settings include an option for clearing unnecessary cache after closing a profile. The suitable cleanup method depends on whether you want to free up space or start working with site data again from scratch.
Archive, recycle bin, and permanent deletion
Archive: set profiles aside
When a project is completed or paused, select its profiles and choose Actions → Archive / Actions → Archive. To bring them back, use the archived profiles filter and Unarchive / Unarchive.
The archive is convenient for separating profiles from current work. Do not expect archiving by itself to create a separate backup copy or free up space in the cloud quota.
Recycle bin: check recovery options
Deletion is started via Delete / Delete. Before confirming it, check the recycle bin settings: storage of deleted profiles can be disabled, and the time before cleanup can be changed. Therefore, there is no universal promise that a profile can always be restored within two weeks.
If a profile went to the recycle bin, open Recycle bin / Recycle bin, find the required entry, select it, and choose the restore command. After that, return to the regular list and check the profile. The interface also provides viewing deleted profiles through the Deleted status.
Permanent deletion
Deleting from the recycle bin is a separate action. Before doing it, check the names, count, and program warning again. Do not use bulk permanent deletion if you have not yet decided which profiles you need to keep.
For cloud profiles, take the deletion location into account. Deletion through the cloud web panel should not be considered equivalent to moving a profile to the local recycle bin of the application; the recycle bin description separately states that a profile deleted through the cloud panel cannot be restored this way.
Moving to the cloud and back
The storage type is displayed in the Type column. Local profiles are stored on the device, while cloud profiles are available through cloud storage according to the user’s permissions.
To send local profiles to the cloud, select them, open To Cloud / To cloud, and choose a group. Before moving, check the free cloud profile limit and access to the group. After completion, make sure the storage type and group have changed.
For the reverse transition, use To Local / Make local. Treat this as a change in storage method. If you need a separate file for transfer or safekeeping, choose export.
Before handing work over to a colleague, close the profile and wait for synchronization. The Cloud sync button is located in the top panel of the manager; the presence of a profile in the list alone does not confirm that the colleague has received the latest changes.
You can use the cloud to move local profiles between devices: send them to the cloud on the source computer, then make them local on the target computer after synchronization.
Why a command is unavailable or did not apply to everyone
| What you see | What to check |
|---|---|
| The start button is inactive | Whether rows are selected: at 0 / N, there is nothing to apply the action to |
| The number of selected items changed after refining the search | Rebuild the selection and check the bottom counter |
| Export is blocked | Whether your plan supports profile export and whether your role allows it |
| The command does not apply to some rows | Whether the storage type, engine, and profile status match the task |
| The profile has the Started status | Whether work in the browser has been finished before changing or clearing |
| A cloud profile has the Locked status | Whether a colleague is working with it; whether the previous session ended correctly |
| An imported or restored profile is not visible | Search, filters, the selected folder, and recycle bin view |
| A colleague does not see the profile after transfer | The group, access permissions, and synchronization completion |
Plan and role are different restrictions. Even with a suitable plan, a command may be prohibited by the administrator. The Locked because of role permission hint on the export button directly points to role permissions. In this case, contact the license administrator; the permissions setup is described in the documentation.
If a cloud profile remains Locked after a failure, first make sure it is not being used anywhere. There is a separate procedure for emergency unlocking. It may cause loss of unsynchronized data, so do not use it as a replacement for normal profile closing.
If a bulk operation was completed only partially, find the remaining profiles and the reason for the error. Repeat the action for the required rows after checking; rerunning it for the entire original group may be unnecessary.
Three habits that prevent confusion
One selection — one clear task. For an update, gather the profiles that need the new version; for handoff, the profiles of the required group; for the archive, the completed project. The clearer the criterion, the easier it is to notice an extra row.
Before the command — count and names. Check the bottom counter, highlighting, names, and the parameters you are going to change. After changing the search, filter, or row order, check the selection again.
After the command — the result in the profiles. Check the folder, tags, proxy, storage type, or browser version. For behavior changes, perform a test launch. This keeps bulk work manageable with six profiles as well as with several hundred.
Related posts
View all articlesJoin 450,000+ users who chose Undetectable
- Advanced anti-detection technology
- Unlimited local profiles from $49
- The perfect solution for multi-accounting