Setting up SSH tunnels in Windows and macOS

Setting up an SSH tunnel in Windows
- Install Putty
- Launch Putty
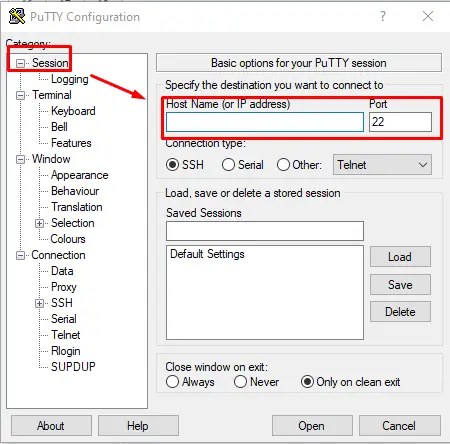
- Enter the host and port from your SSH tunnel.
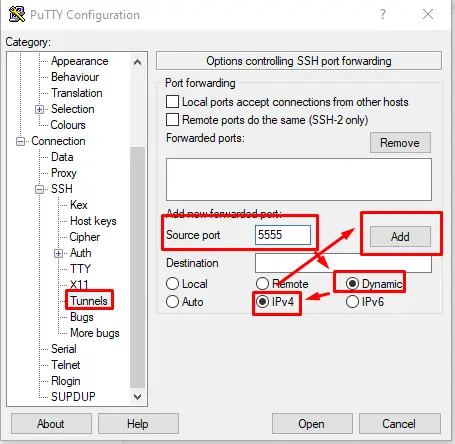
- Configure the local port to which you will connect from Undetectable (it can be any free port). Enter the dynamic IPv4. Click Add.
- After that, you can go back to Sessions and save the settings so that you don't have to enter the data every time.
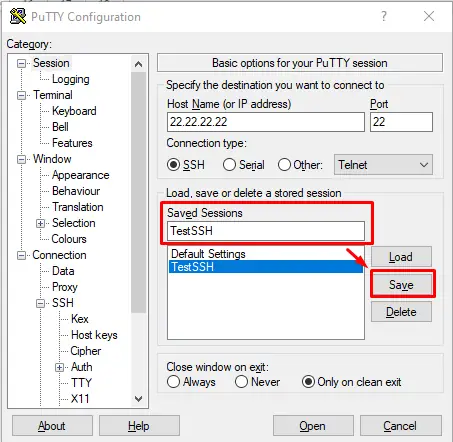
-
Click Open, a terminal opens where you need to enter the login and password for your SSH tunnel.
-
After that, you can open Undetectable. There you choose any profile and on the Proxy tab, configure: proxy type Socks5, Host 127.0.0.1, and the port you selected in the fourth step. Click Check to confirm.
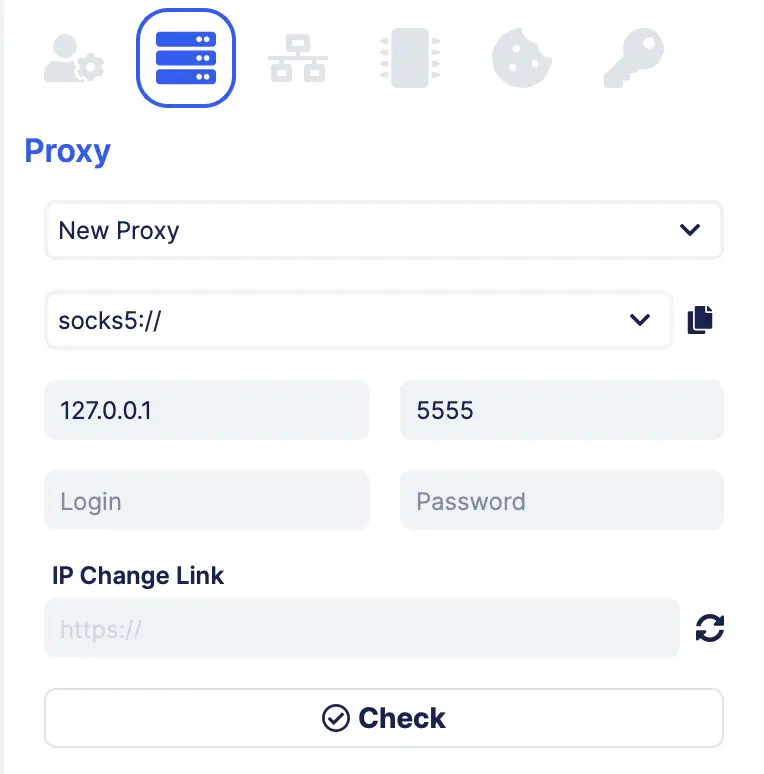
This way, you can start multiple SSH tunnels by running multiple copies of Putty, placing them on different ports, and connecting to them from different Undetectable profiles.
Setting up an SSH tunnel in Mac OS
Launch the terminal and enter the command
ssh root@10.10.10.10 -D 1080
- Instead of
root, enter the login for your tunnel. - Instead of
10.10.10.10, enter the IP of your tunnel. - Instead of
1080, enter the port that you will specify in the program settings. - Enter your password.


You need to configure a new proxy in the program
- Select
socks5 - Enter the local IP
127.0.0.1 - Enter the port that you specified when setting up the SSH tunnel.
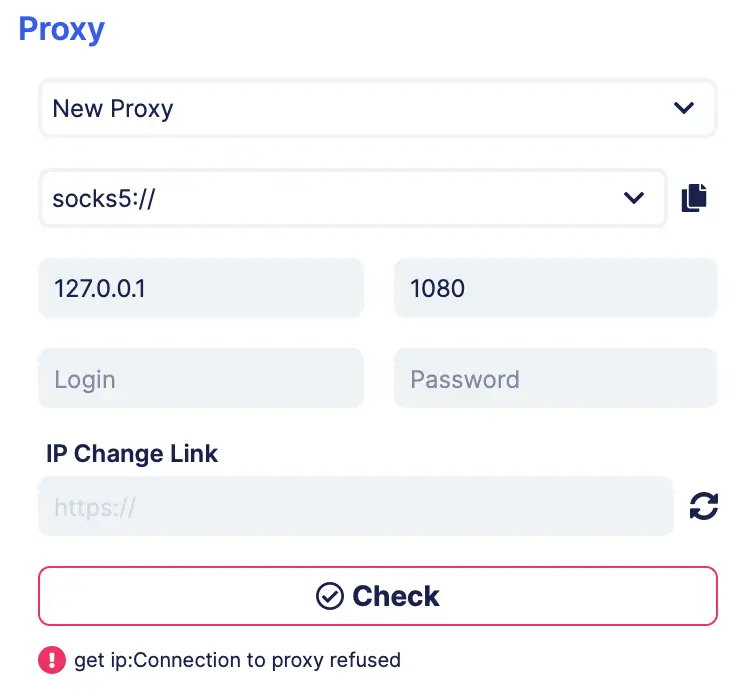
Once the SSH tunnel is established, you can check if the proxy is working.
This way, you can start multiple SSH tunnels, assign them to different ports, and connect to them from different Undetectable profiles.

Undetectable - the perfect solution for

