Many users of antidetect browsers know that one of the key features is the ability to create unique browser profiles. These profiles help mask your online identity, making each site see you as a separate user. To save time from manually creating multiple profiles, Undetectable offers a bulk profile creation feature. In this guide, we'll walk you through how to use this incredibly useful feature.
In the Undetectable browser, you can bulk create profiles in two ways—using only configurations or using your own file along with a configuration.
What's the Difference?
A configuration is a set of browser fingerprint data based on real devices.
When you use configurations to create profiles, the fingerprint data of the profile will be completely replaced by the data from the configuration. Thanks to real fingerprints, your profile won't stand out among real users.
When creating profiles from your own file, part of the fingerprint data (cookies, UA, proxy and its type, geo) used in creating the profile will be taken from the file you provide, while the rest will come from the configuration.
Bulk Profile Creation Based on Configurations
In this section, we will go through the steps to bulk create profiles using configurations.
Step 1: Open the Bulk Creation Window
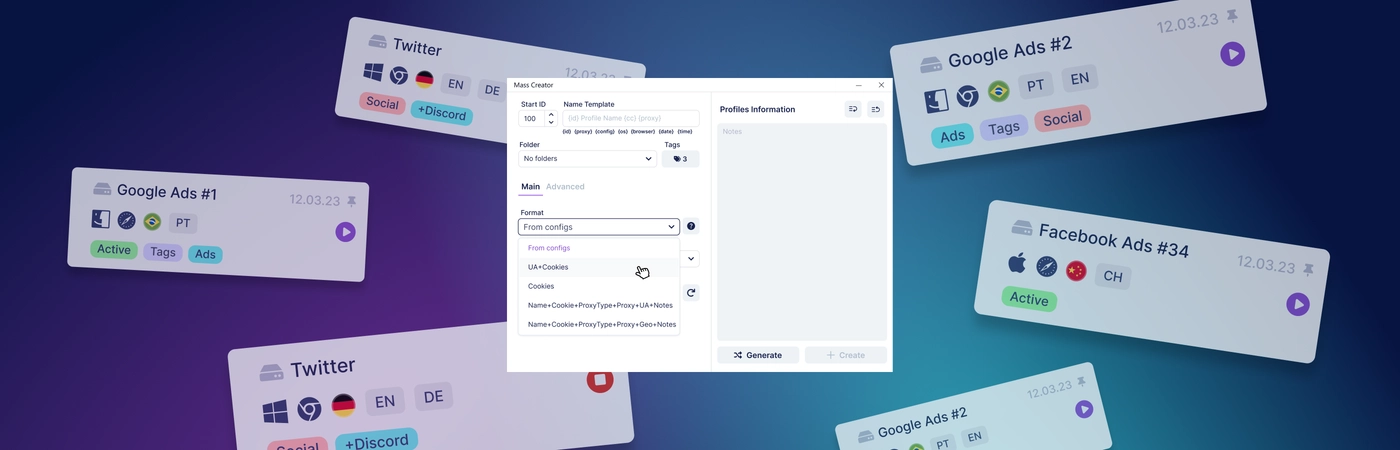
- Launch the Undetectable browser. In the control panel, find the "Mass creator" button and click on it. A bulk creation window will open, where you will create profiles.

Step 2: Set the Profile Name
- In the “name template” field, you can set a naming template for all created profiles. For example, if you enter "Test", the profiles will be named 1-Test, 2-Test, and so on.
- Specify the starting number for profile numbering in the “Start ID” field. If you want to start with "1", enter "1". If you want to start from a different number, like "3", enter "3".
- In the “Folder” and “Tags” fields, you can assign a folder and tag to the profiles for easier navigation.
Step 3: Set Basic Profile Settings
- In the “Main” section, choose the basis for creating profiles. In the 'format' field, select one of the options. We choose the option "From configs."
- Choose the number of profiles you want to create in the ‘amount’ field.
- Select the operating system for the profiles, as well as the browser.
Step 4: Set Advanced Settings
In the “Advanced” section, you can configure:
- Screen resolution;
- Add a proxy;
- Set the profile language(s);
- Specify the start page;
- Define a login script for the profile.
Step 5: Generate Profiles
After completing the previous steps, click the "Generate" button.
Once generated, the list of created profiles will appear on the right. By clicking the “+” icon, you can view the basic information about each profile.
To finalize profile creation, click the “Create” button.
Your new profiles are now in the program!
Bulk Profile Creation Based on Files
In this section, we will walk through how to create many profiles based on files containing information such as cookies, UA, proxy and its type, and geo.
Step 1: Select the File Format
Open the bulk profile creation window and select the file format in the ‘Format’ field.
Step 2: Fill in the File According to the Template
Click the question mark next to the “Format” field to see the template for correctly filling out the selected file format.
Remember, to ensure all data is transferred correctly, strictly follow the structure of the template.
Step 3: Start Profile Generation
- To generate profiles, upload a JSON or NETSCAPE format file into the area at the bottom of the screen. Then click the "Generate" button.
You can also add file information from a pre-created Excel dicument by copying the data from the cells and pasting it into the field.
All generated profiles will appear on the right side of the screen. Clicking the “+” icon will allow you to view the basic information of each profile.
Step 4: Finalize Profile Creation
To finalize profile creation, click the “Create” button.
Now your profiles are successfully created and ready for use!