How to set up a proxy from Proxy-Store antidetect browser Undetectable?

Proxy-Store offers an impressive selection of public (around 2.5 million), server (approximately 50,000 addresses), residential, and mobile proxies (a total of 25 million IPs).
To learn more about servers and the advantages of the service, visit this link. You can also find a promo code there for a 10% discount on residential (and more) proxies.
Step-by-step guide to setting up Proxy-Store proxy Undetectable
In this article, we will explain how to configure a proxy connection from Proxy-Store in an anti-detection browserUndetectable.
Important: when using a mobile or residential proxy, the steps to configure the browser profile will not be different.
Purchase of proxies and creation of a profile in an anti-detect browser
Step 1. To buy a proxy, go to the website Proxy-Store. Choose the desired category, country, quantity, and validity period.
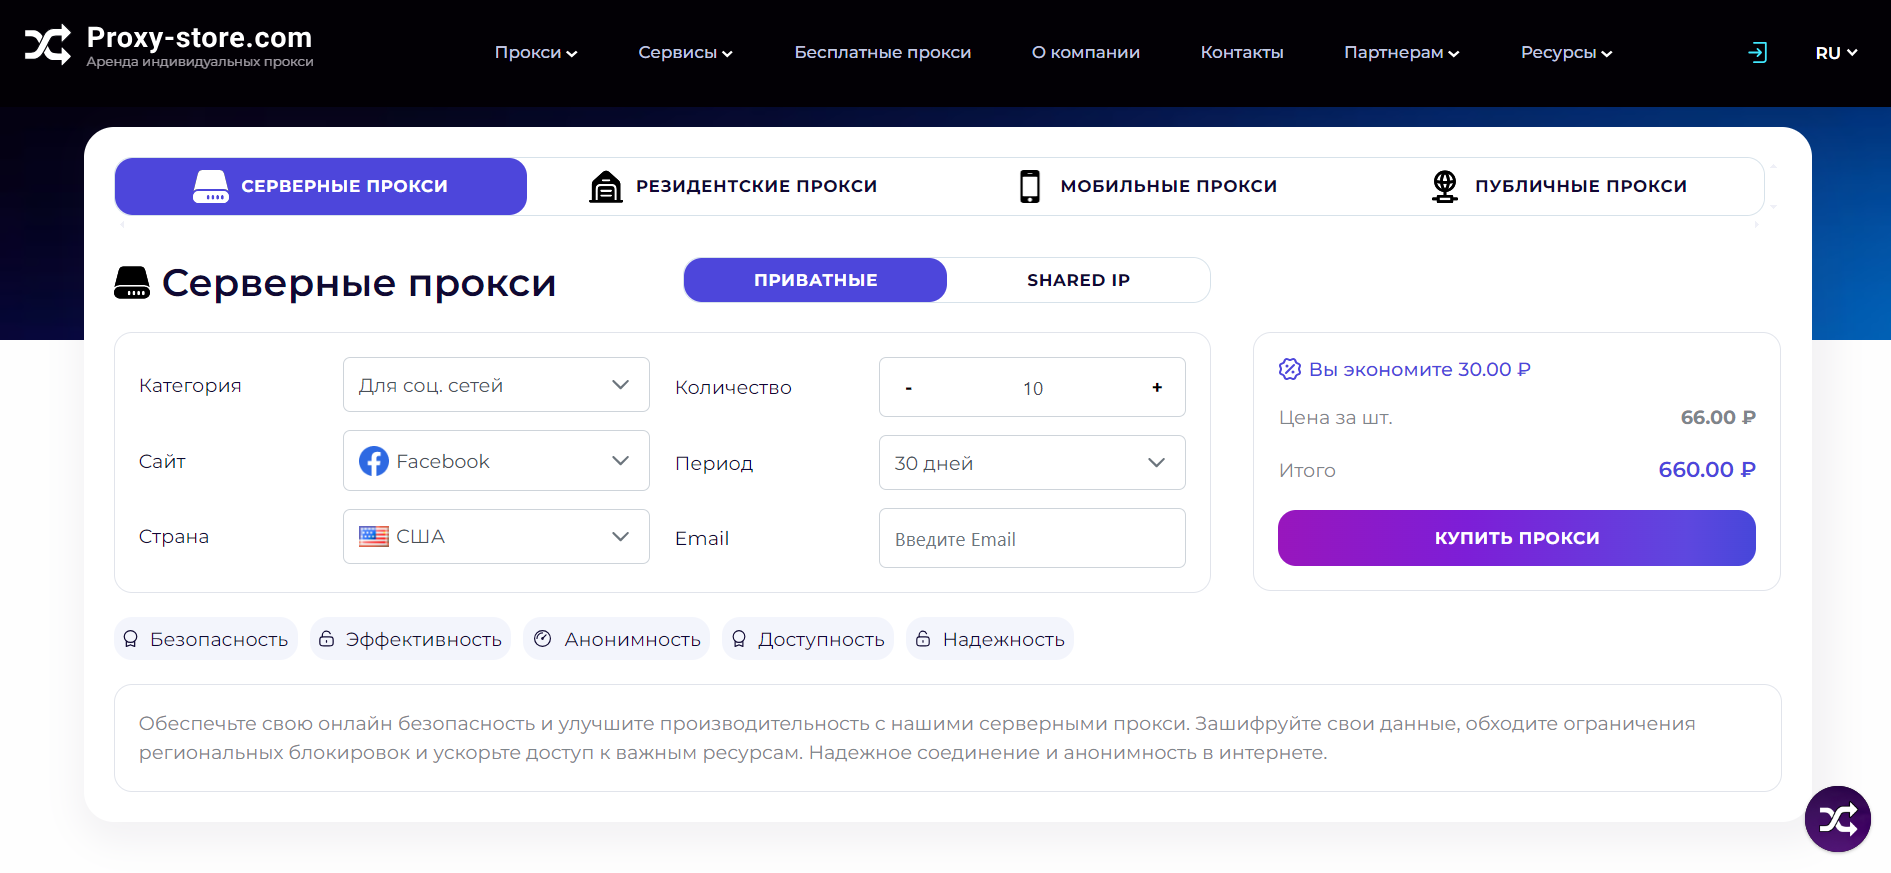
Fig. 1
Step 2. Go to the main menu of the anti-detection browser Undetectable. Click on "New Profile" to create a profile (2.1, see figure 2). After this action, a window for working with profile parameters will appear (2.2, see figure 2).
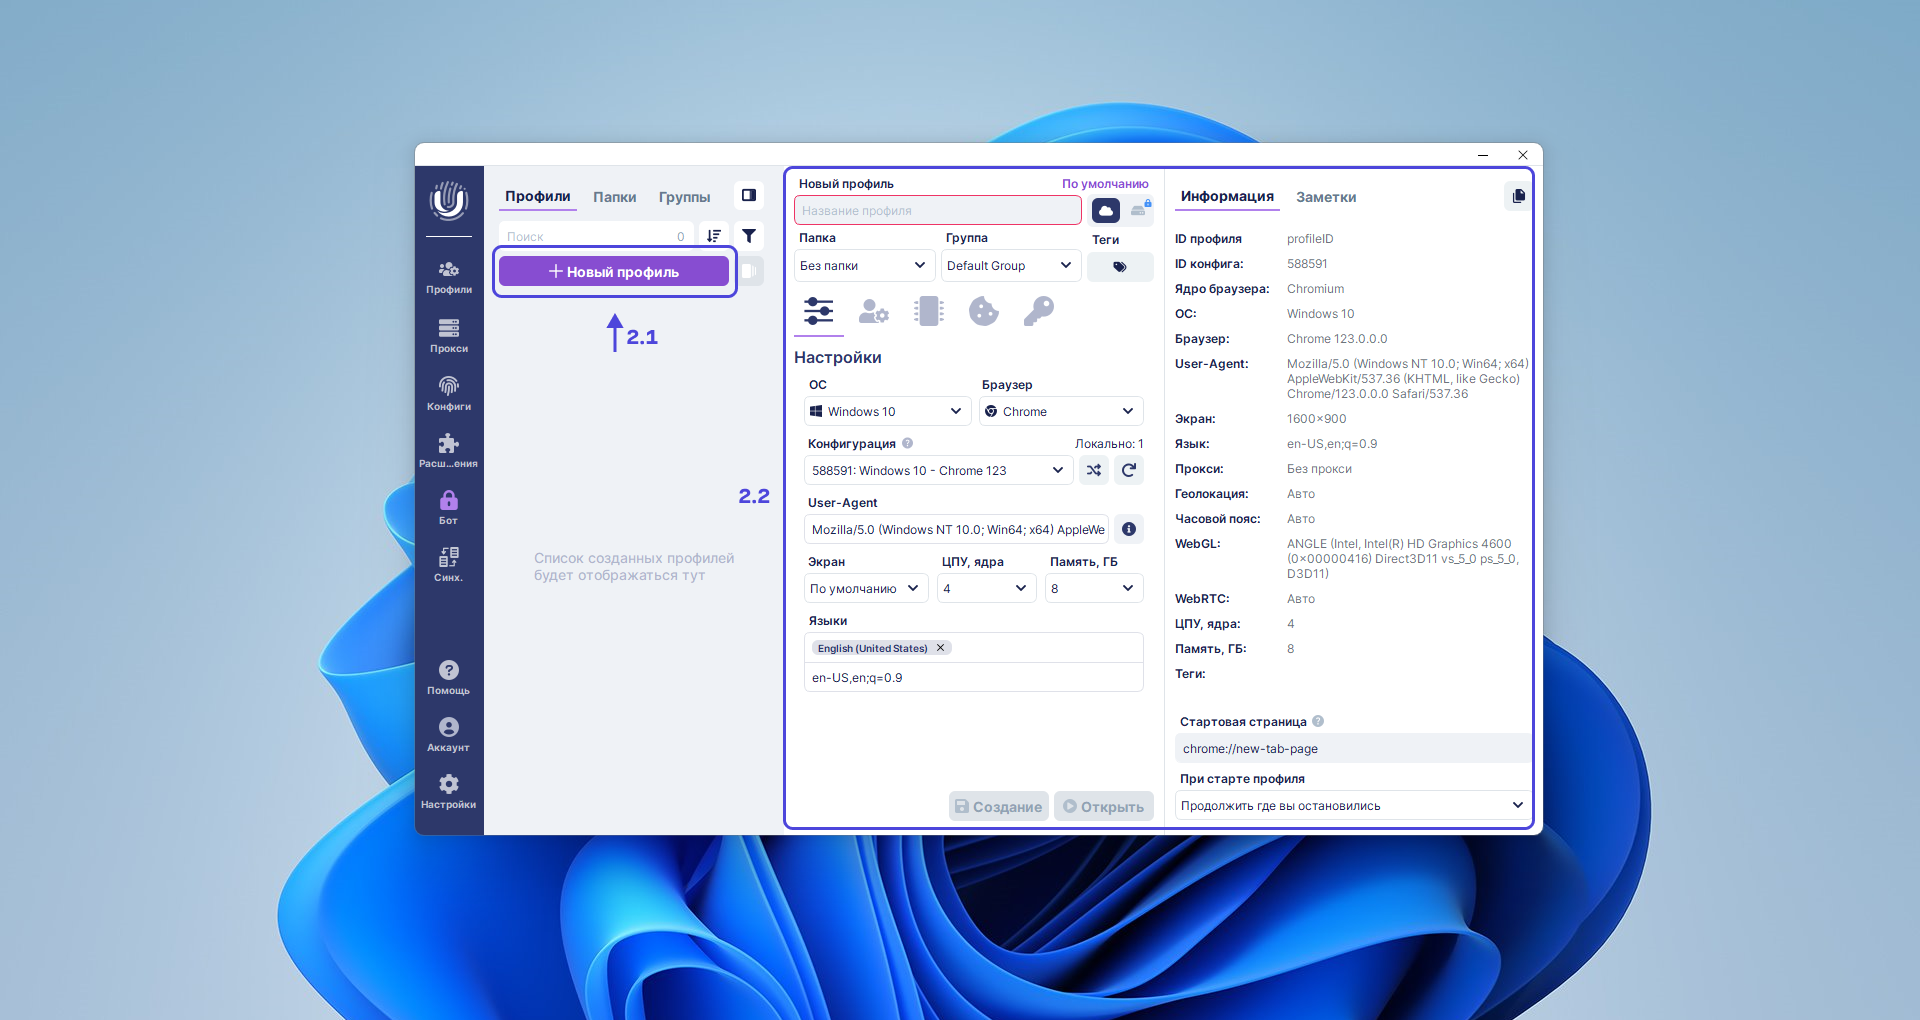
Fig. 2
Step 3. Fill in the field "Profile Name". In this guide, it will coincide with the purchased proxy category "For all websites" (3.1, Fig. 3), but it can be anything.
In the profile settings, specify which OS and browser will be emulated in the profile or leave the parameters suggested by the program unchanged (3.2, fig. 3).
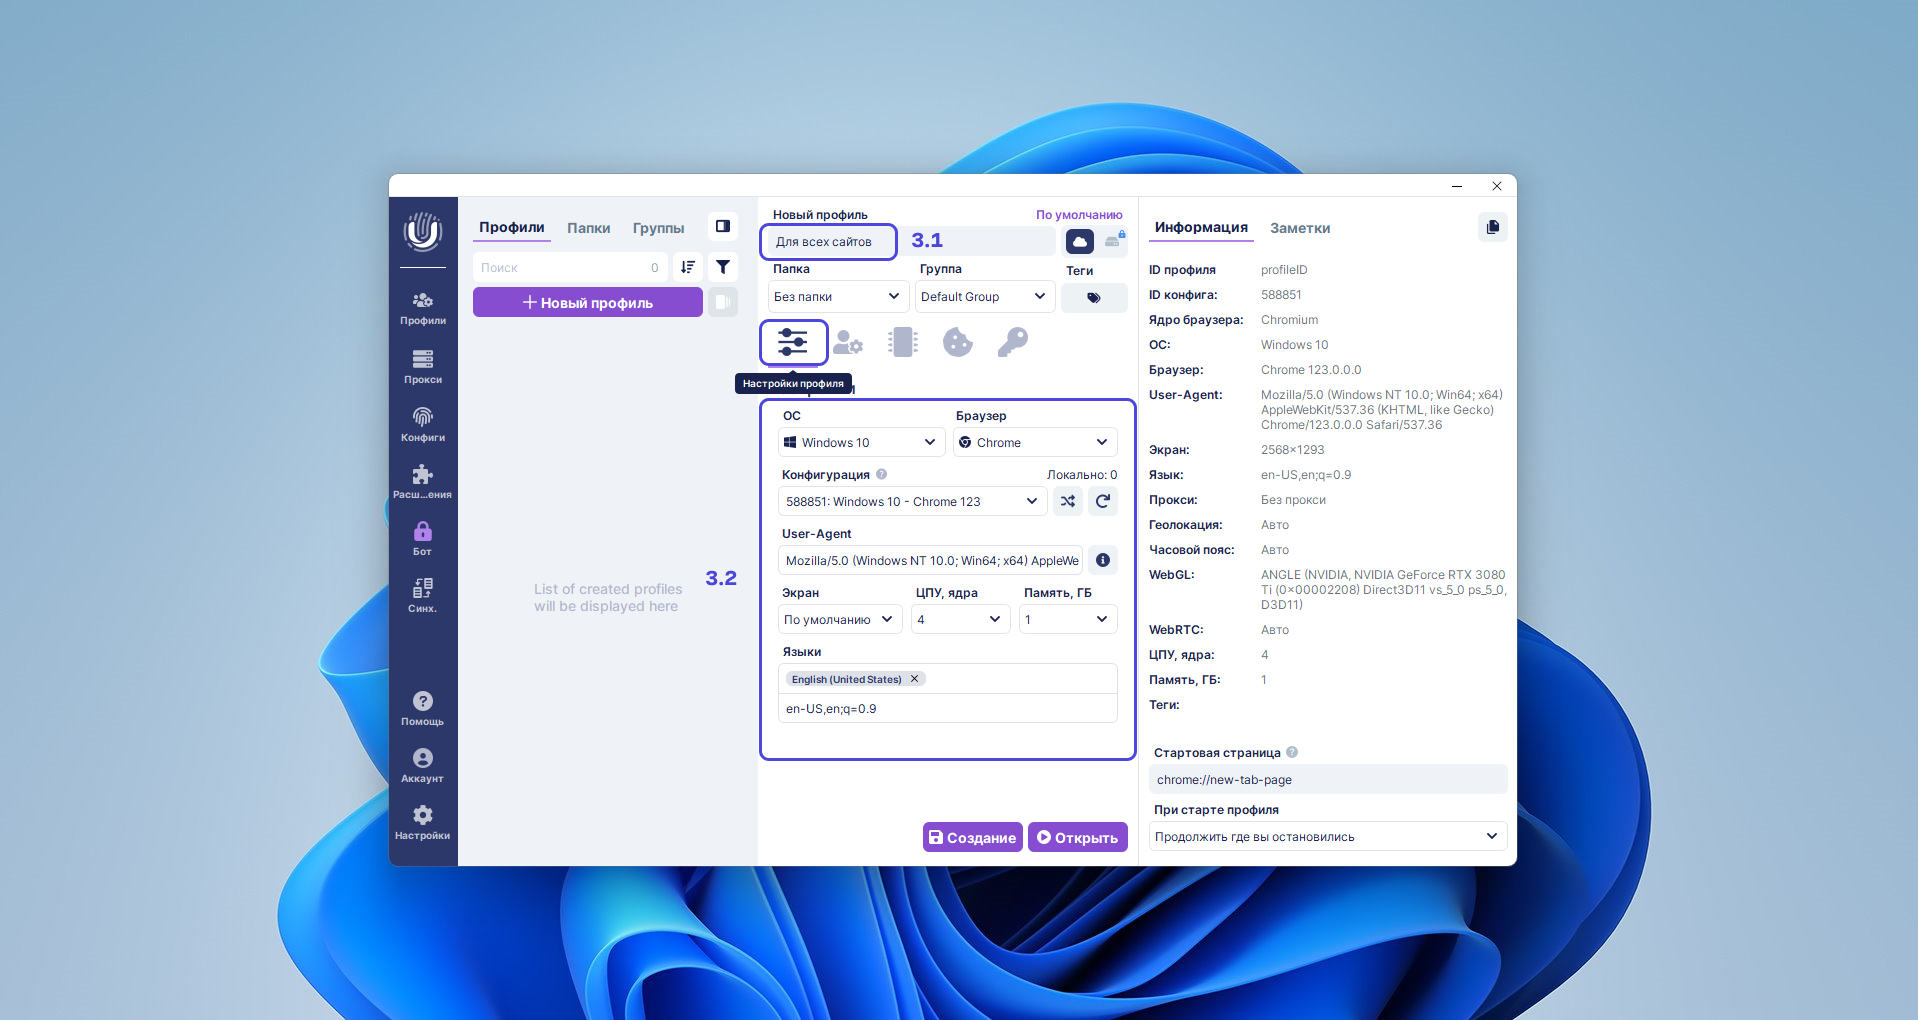
Fig. 3
Setting up a proxy in Undetectable
Step 4. Add a proxy to the profile in the "General" tab. To do this, select "New proxy" from the drop-down list "Proxy" (4.1, fig. 4).
Proxies can be added in several different export formats (4.2, Fig. 4).
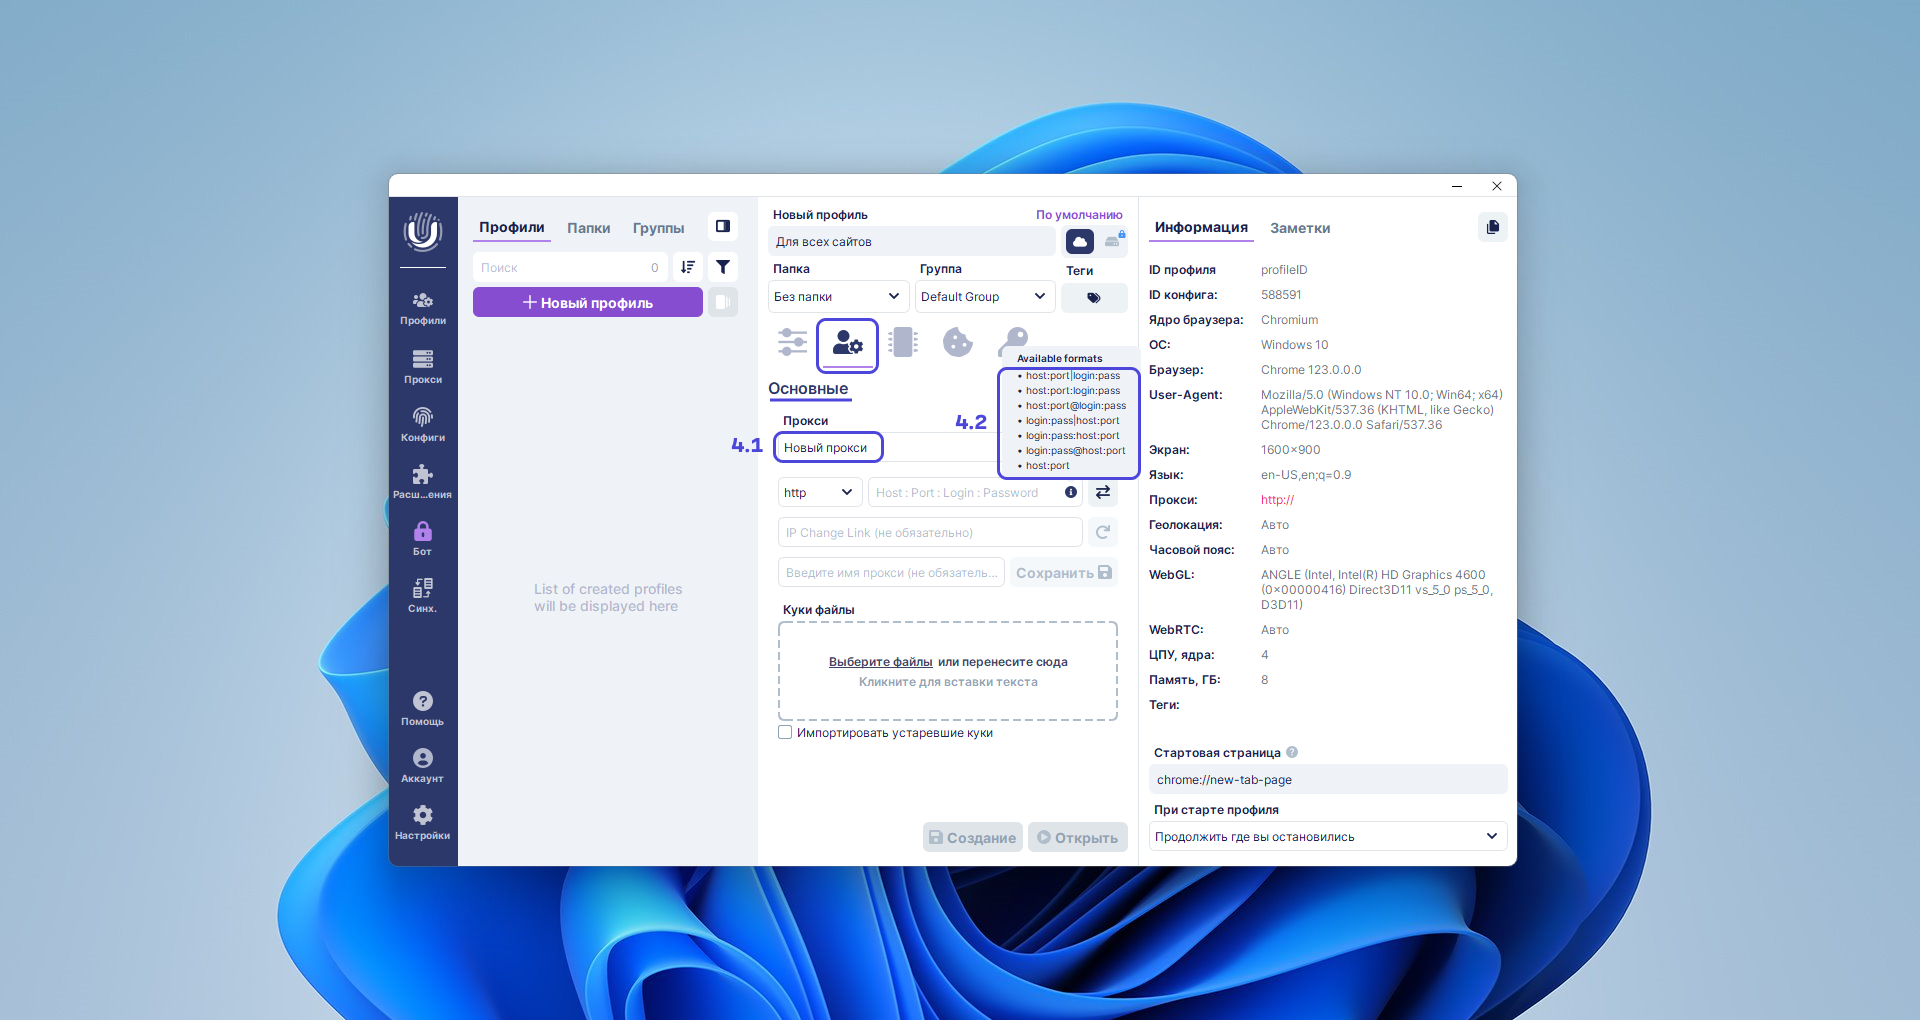
Fig. 4
Step 5. In your personal account on Proxy-Store service, select the proxy to be used in the browser profile. Export it in a format supported by the program. For example, IP:PORT:LOGIN:PASS(fig. 5).
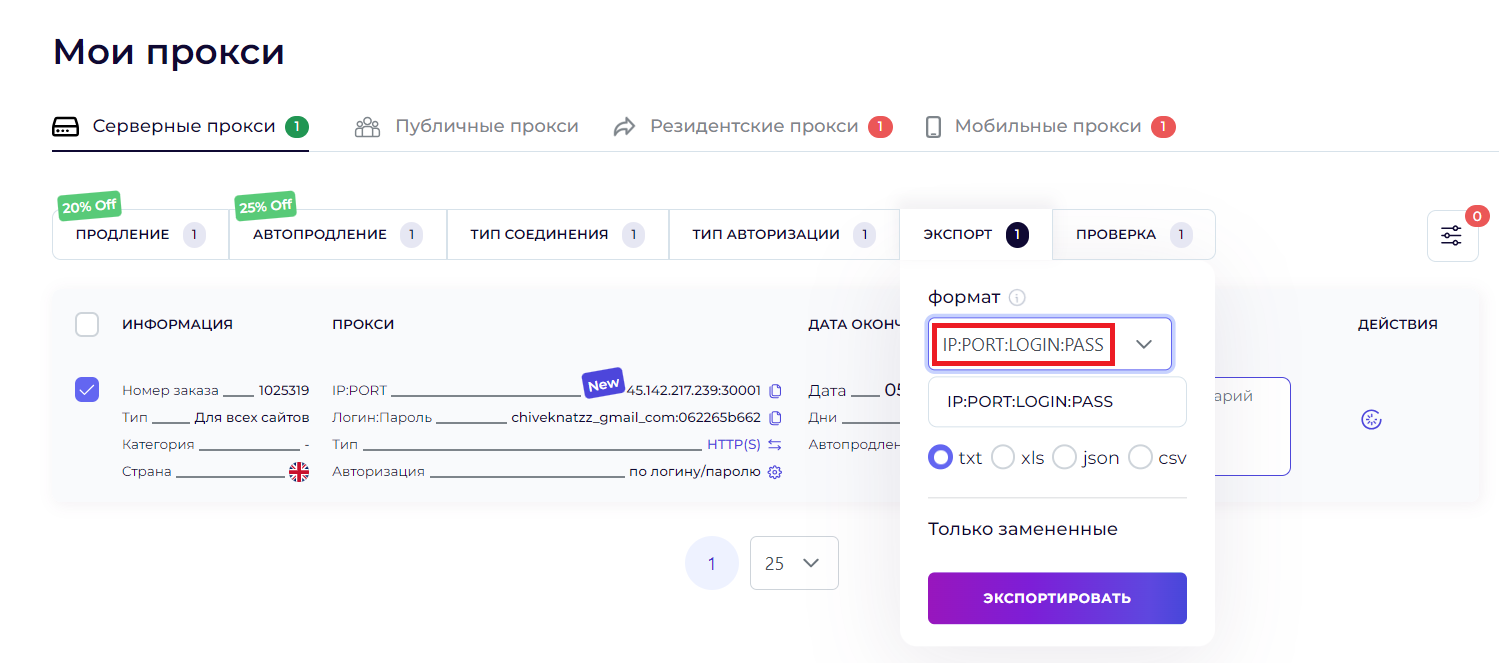
Fig. 5
Detailed information on how to export proxies can be found in the blog of Proxy-Store.
Step 6. After adding the proxy, click on the "Create" button (6.2, see fig. 6).
Note: the proxy type specified in the profile (http or socks5) must match the one indicated in the personal account (6.1, fig. 6).
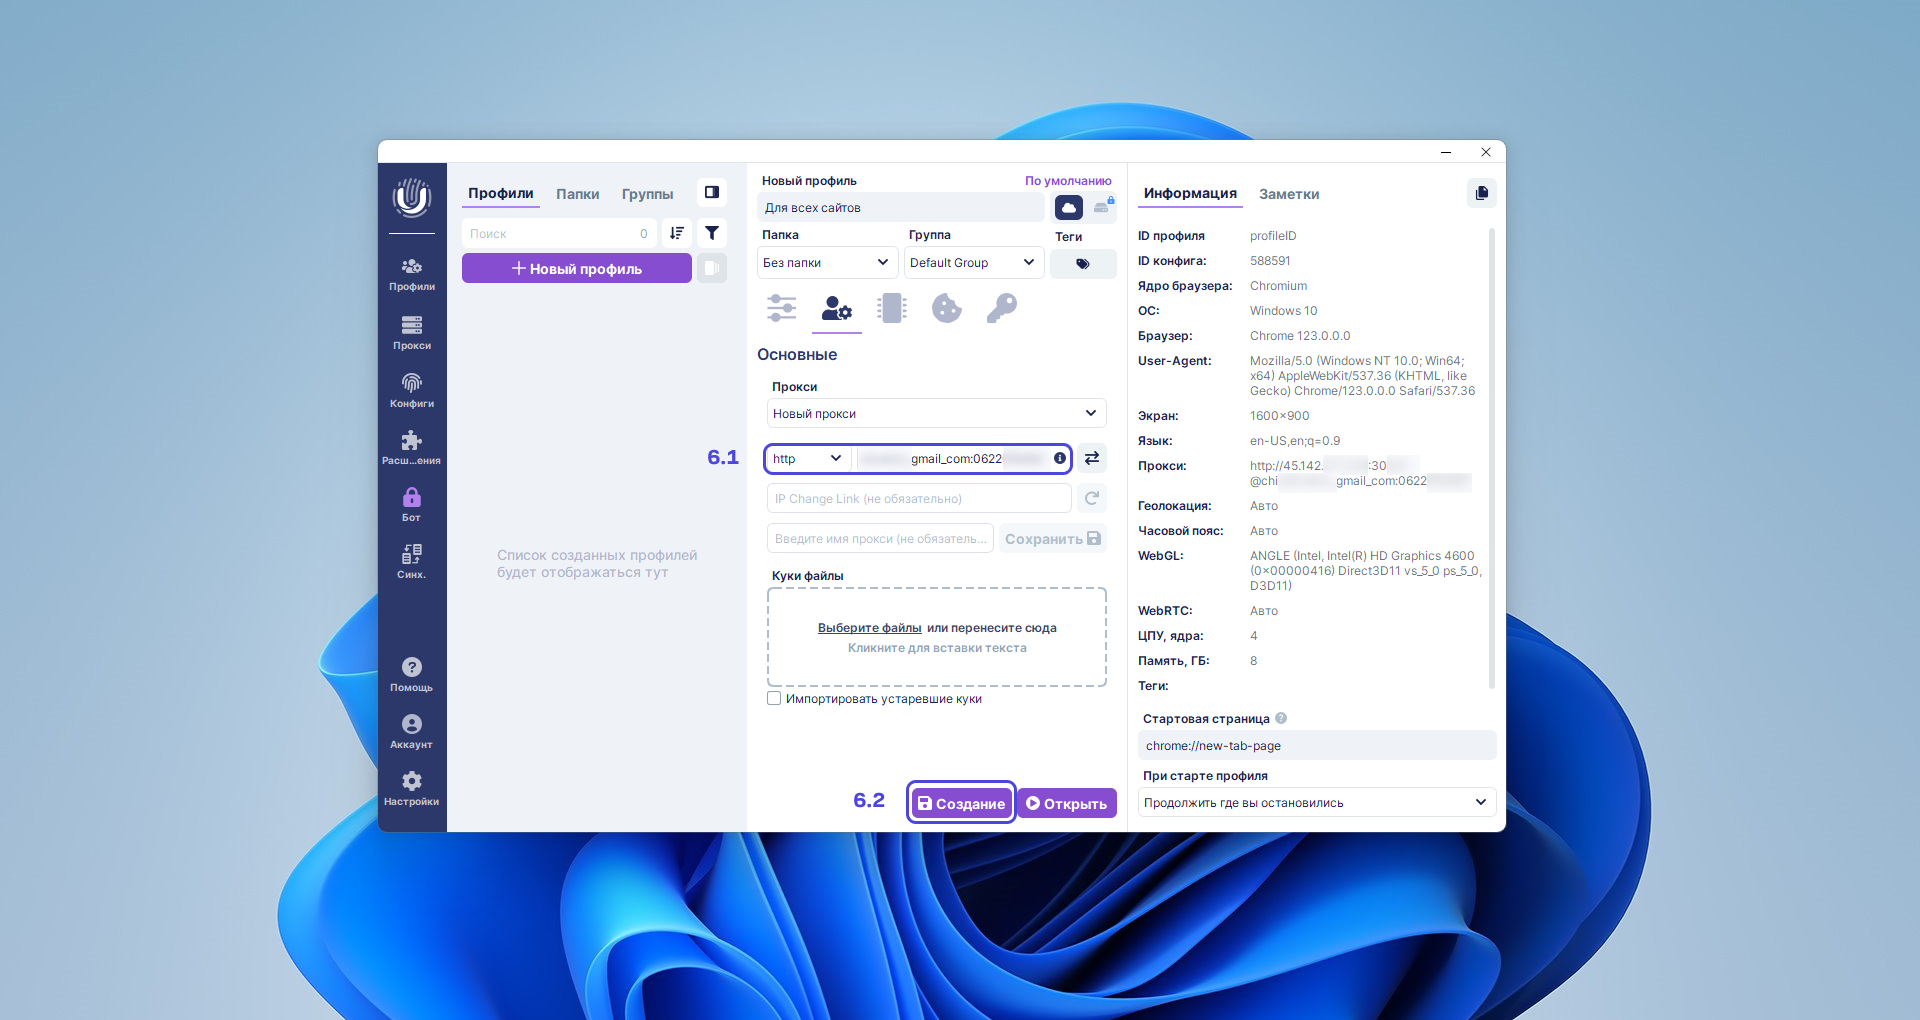
Fig. 6
Proxy Functionality Check
Step 7. The created profile will appear in the list of available profiles (7.1, Fig. 7). To launch it, click on "Open" (7.2, Fig. 7).
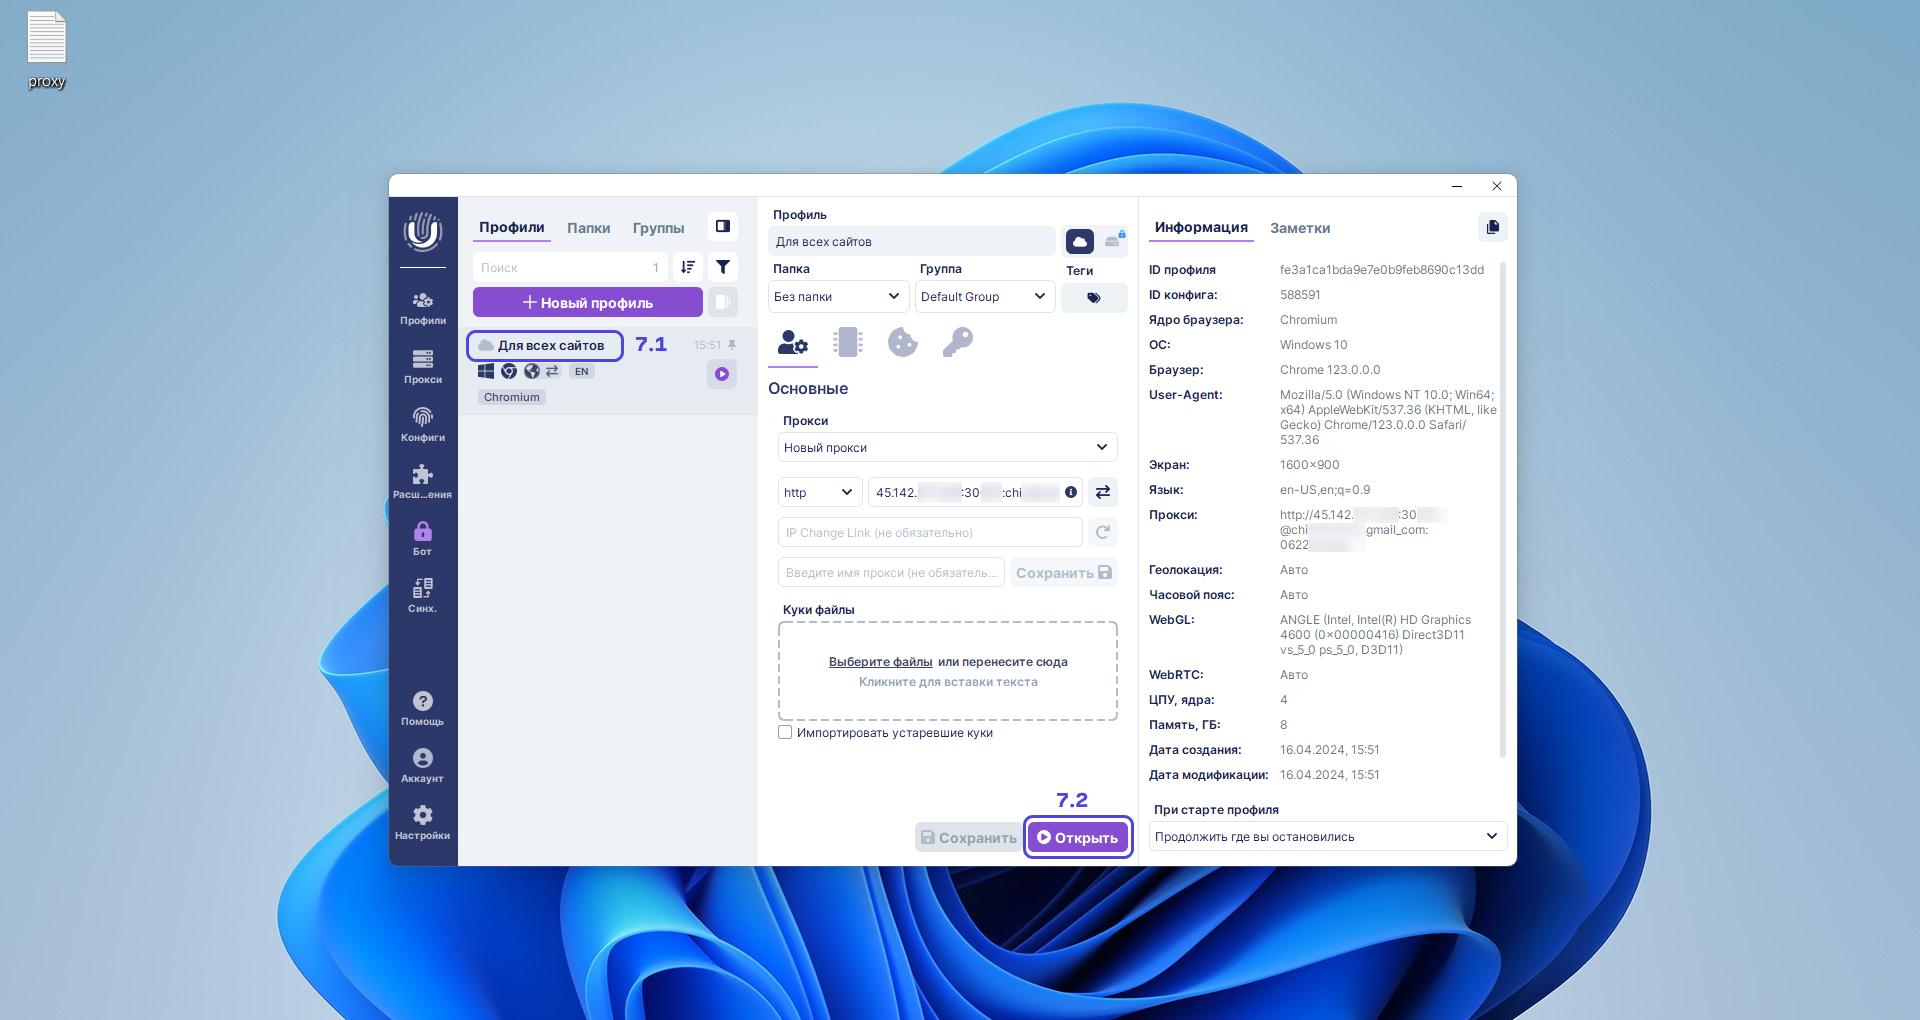
Fig. 7
Step 8. The final check of the functionality of the configured proxy connection can be done on the website www.whoer.net (see figure 8). If the IP on the site matches the IP in the Proxy-Store personal account, congratulations, you have successfully configured the proxy in the anti-detect browserUndetectable
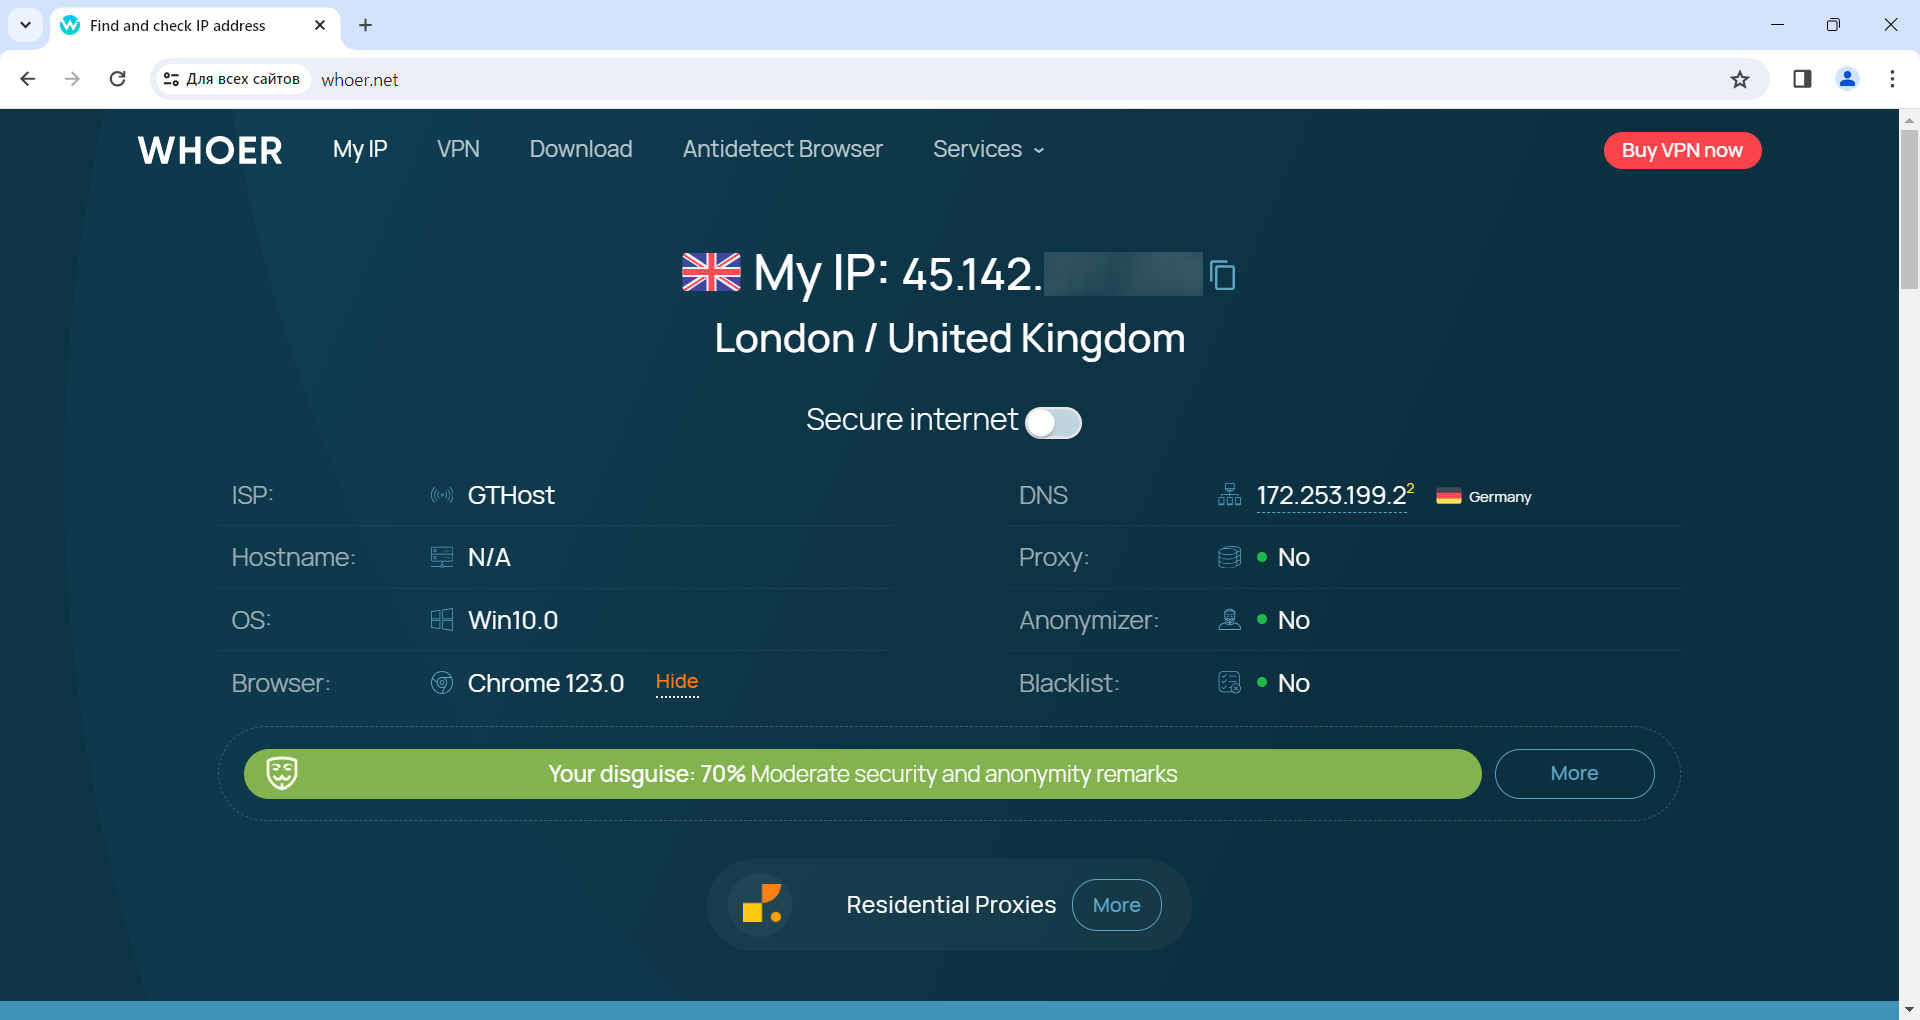
Fig. 8

Undetectable - the perfect solution for

